My tito just came home today and brought a supposedly broken ASUS A8Fm laptop/notebook, i think it is already 4 years old. But upon checking it, it still boots up to Windows XP. I just told my tito to backup the files and do a clean install of the OS.


Well, I opened the HDD cover, and found it is a 2.5" Seagate Momentus 80GB SATA Drive. I'm too lazy to open my desktop just to hook the Laptop Hard Drive and the external 2.5" HDD enclosure that I have for Laptop Hard Drives are for PATA only (also known as IDE). Luckily I have an External HDD Enclosure for 3.5" HDDs. I think it will be enough since the SATA Data and Power Connectors are the same.
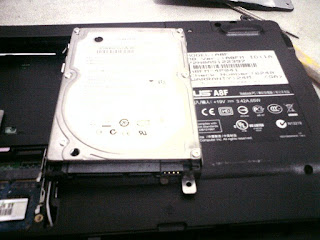

Pic 2: 2.5" Seagate Momentus 80GB SATAII
I'm planning to repair also one of the the Hinges of the laptop because it is already loose and the LCD screen is wobbling badly, but it has to wait because I will visit my fiance at their home after lunch. I'll try to post the work logs here maybe tonight (can't wait to work on it, hahaha).
One thing to remember when doing a reformat or clean install on a PC or laptop. Make sure you backup all the data first and you have a copy of the Drivers that comes with the laptop or PC. If the Drivers CD is already lost, download them on the manufacturer's site.
Most of the laptops that I encounter, the drivers and the OS are already built-in to the hard drive, so whenever you chose to reformat the laptop, the laptop will automatically install the OS and the drivers for you. So you if you ever lost the driver CD for the laptop, it's not really a big deal. But don't lose the Driver CD in the first place, you'll never know when you'll need it. :)
Update (Nov. 15, 2010):
For the ASUS A8Fm laptop, the OS and the drivers are not included in the hard disk, but fortunately, I already downloaded it (380MB all in all).

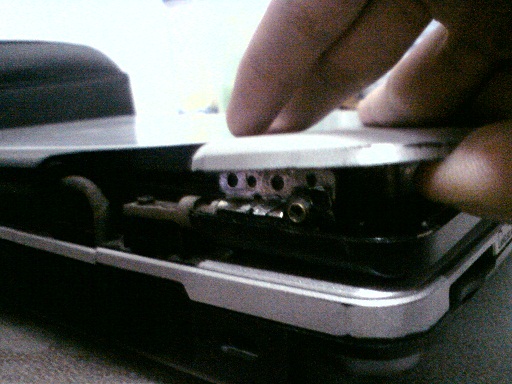
Pic 4: Damaged Hinge.

Pic 5: LCD Disassembly (LCD screws exposed).
You will notice that there are rubber pads located along the side of the LCDs. Remove those rubber pads with any pointy thing, jsut don't overdo it or you'll leave a scratch.

Pic 6: LCD Disassembly (Crack-open the front LCD bezel).
To remove the front LCD bezel or cover, pry it open with a hard plastic, I usually use a guitar pick or an old credit card. You can even use your flat head precision screw driver just be careful or you might end up leaving scratches or dents .


Pic 7: LCD Disassembly (Front LCD bezel removed).
Now, we've removed the bezel, we can now estimate the damage. Fortunately, the hinge screws just came loose with the base and to the LCD frame. We'll just have to re-align the hinge and screw them back into place.


Pic 8: LCD Disassembly (Broken Hinge).

Pic 9: LCD Disassembly (Hinge fixed).
Reverse the process that we've done and we're set to go to install the OS and the drivers.While I was installing the OS and the softwares, I found out that some of the keyboard keys are not working, I just grabbed my spare keyboard just get the softwares installed. Looks like my plan of overhauling the laptop will go after all.
To start the off, turn the laptop upside down for us to see where are the screws located. Basically, you must remove all the screws that you can find. You'll also need some tools like the ones below. They precision Flat Head Screw Drivers and they can be bought in any hardware stores.

Pic 10: Flat Head Precision Screw Drivers
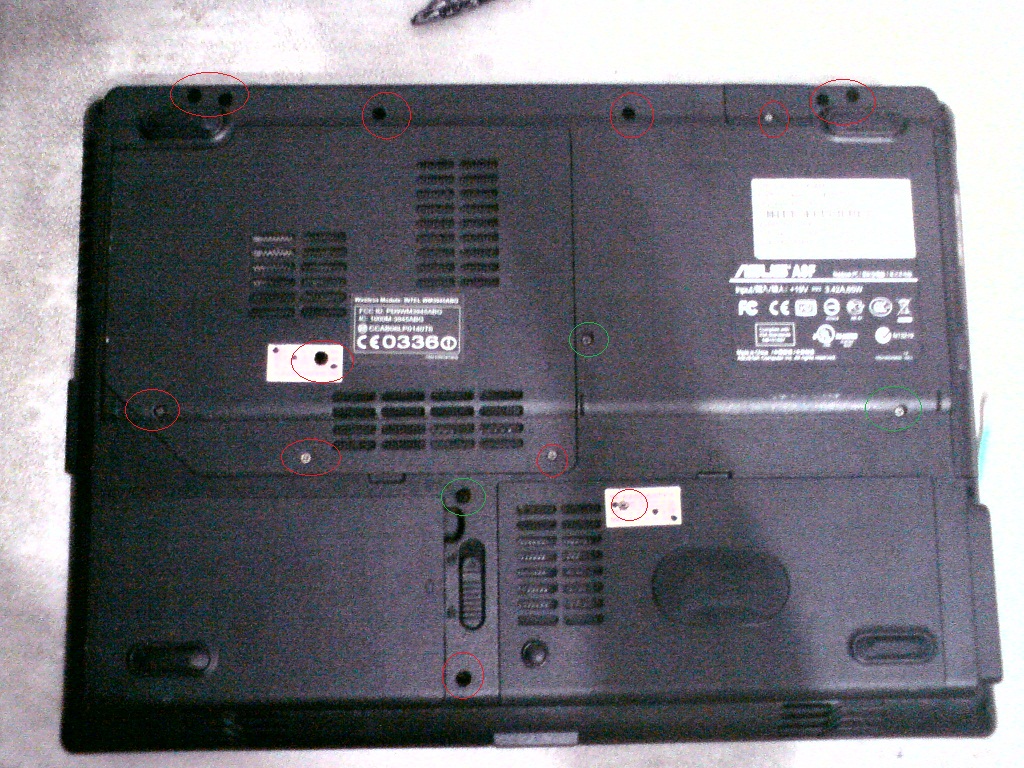
Pic 11: Underside of the Laptop
Next, turn the laptop upside up again to remove the keyboard because there are screws underneath it. There are hooks on the top of the keyboard and you just have to press them down to release the keyboard. Next don't pull it out yet, you must slide the whole keyboard upwards and gently because you don't want to rip the ribbon cables. After fully unhooking the keyboard, gently pull down the locks on the ribbon cable of the keyboard (the white part). To put it back again, just slide the ribbon cable to the slot and push the white lock so that it will sandwich the ribbon.

Pic 12: Keyboard Ribbon Cable and connector

Pic 13: Screws under the keyboard
Almost ready to pry the top cover using again our trusty credit card, but we must remove also the ribbon cable of the touch pad and the Front bezel of the LCD again.
The touch pad ribbon cable will just get in the way when we open the cover. Just slide down the white part to release the cable just like what we did with the keyboard. Remember that the LCD has 2 cables running at the hinges? The cable on the right hinge is insanely short in such a way that it will be hard to pull the LCD out and remove the top cover.

Pic 14: Touch pad ribbon cable.

Pic 15: Right Hinge cables.
At last we can remove the top cover, but be cautious again that the cable at the right hinge is still too small to fully remove the top cover. I can't seem to find a way to release the cable and I'm already stressing the cables, so I just have to work on what I can. So while doing the repairs, why not remove the dust on the motherboard using a paint brush, not the water color brush :)

Pic 16: Top cover removed.
Also turn the laptop upside down again to clean the underside, specially the fan near the CPU.

Pic 17: CPU, Heat Sink Fan, and the RAM

Pic 18: Underside with all the covers removed. Bottom right side is the Hard Disk bay, to the left is the battery. Top right is where the screws of the CD ROM Drive, on the top middle is the RAM, and the left of it is the CPU and the CPU Heat Sink Fan.
After all the housekeeping is done, just reverse the process of what we've done and you're good to go. Just a note to tighten the screws near the hinges. You don't want them to be loose or else the plastic housing will be the one give way and it will be more difficult to repair, sometimes it is impossible.
You can now disassemble any laptop that you can get your hands on, but as a disclaimer, disassemble it at your own risk because you may void the warranty.
I hope this helps. Just e-mail me or post your comments if you need any help.
No comments:
Post a Comment